Constructive Solid Geometry

Drawing Brushes
Creating brushes in your scene is a piece of cake, and with a few click you can start building. We are going to start out by creating a simple box brush. Click on the box icon on the Object Bar, if it isn't already selected. Move your mouse to the "Top - XZ" viewport. Left-click anywhere in the viewport and move the mouse while holding down the left mouse button. When you let go of your left mouse button the new box will be created in the space you have outlined. Congratulations, you've made your first box!
Grid Snap
The grid you can see in the viewports is very useful when you are creating new brushes. By default the brush that is being created snaps to the edges of the grid. Take that into account when you start drawing a brush.Let’s adjust the grid size times by pressing the ] keyboard shortcut three times. (You can also use the grid size menu items in the View menu.) Now create another box in the same viewport where you increased the grid size. Notice how the CSG box snaps to edges of the now larger grid?If you don’t want new brushes to snap to the grid, you can disable grid snapping by unchecking the Edit > Grid Snap menu or by disabling this in the options editor.
Other Types of Brushes
Boxes aren't the only brush that you can create in Leadwerks. In the object bar you can see other shapes including a cylinder, wedge, cone, and even a sphere.But wait…there's more! Select the object tab in the side panel to view the objects panel. There are two dropdown lists near the top of the panel. The object dropdown list lets you create several other types of brushes as well as other special entities, which we will cover in later tutorials. The object dropdown list includes two categories of brushes; primitives and compound. Primitives are the same simple shapes found in the object bar. Compound brushes are more complex brushes made up of multiple parts, including arches, tubes, and a torus shape, and are useful for special architectural features.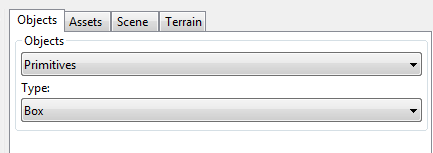 Select the Compound category from the Object dropdown list. In the Type dropdown list choose Tube. Below the Type dropdown list you can see the Segments setting. The amount of segments determines the number of sides the brush will have. Note that not every CSG brush has this option available, since it wouldn't make sense for every shape. Let’s set the segments to 24. This will results in a tube with edges that appear very round. Change the Thickness setting to 0.2. This will result in a tube with a very thin wall.Now activate the "Left - ZY" viewport. We are going to create a tube right above the box we just made. Click and hold down the left mouse button and drag the mouse to create a temporary shape. Let go of the mouse button to create the shape.

Move, Resize, Rotate, and Skew
Moving, resizing rotating, and skewing brushes are actions you will frequently perform while building game levels. There are a few ways we can do this.
Move and Resize
Select the tube you just created (if it isn't already selected) by clicking on it in the viewport with the left mouse botton. The selected brush will appear red when it is selected. When a brush is selected, a selection bounding box will appear with tabs on the edges and corners. You can grab these tabs by clicking with the left mouse button and dragging the mouse. This will resize the bounding box. You can also grab the center of the box and drag it to move the bounding box. When you resize brushes this way, their texture coordinates will automatically be updated to fit the new size of the brush.

Rotate
Before we start rotating the CSG brush, take a look at the top toolbar. Notice how the Translate toolbar button is pushed.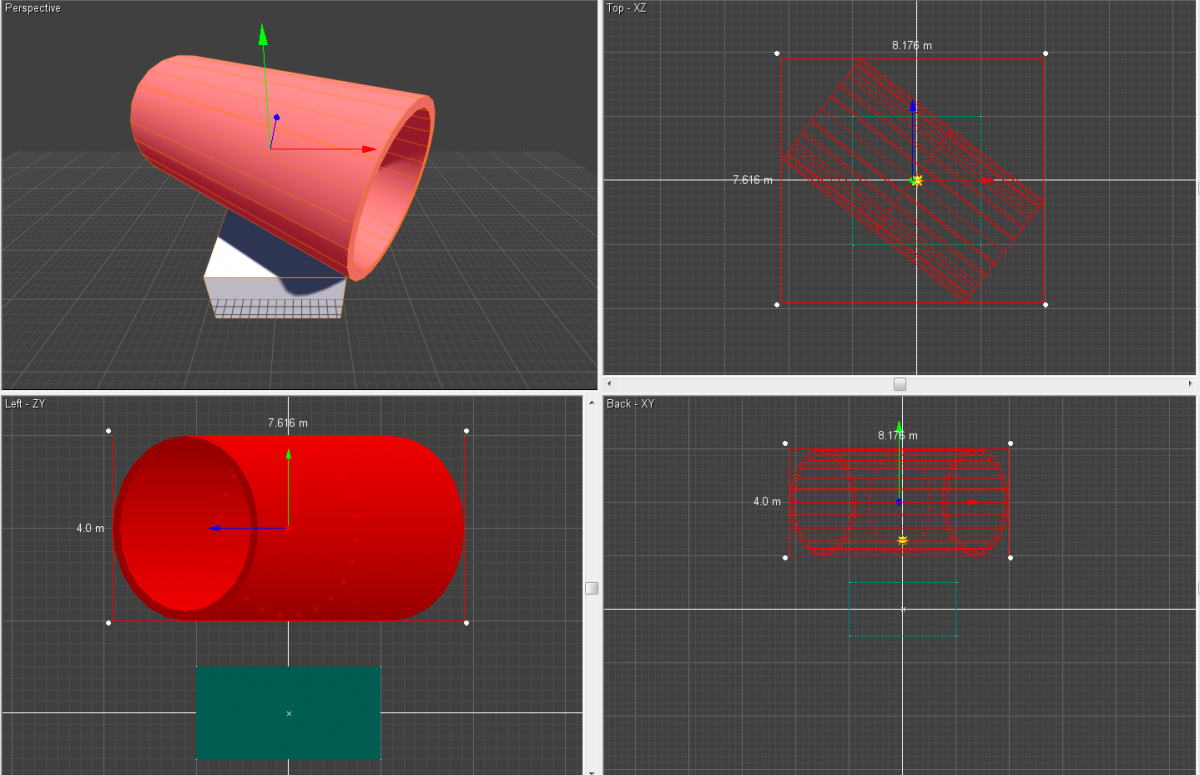 You can also perform a fast 90 degree rotation on any axis with the Rotate X, Rotate Y, and Rotate Z toolbar buttons.
Skew
You can switch to skew mode by selecting the Skew toolbar button. Alternatively, you can do this by clicking once inside the selection bounding box and releasing the mouse without moving it. (You can quickly cycle through translation, rotation, and skew modes by clicking inside the selection bounding box in this manner.)Select the box brush you created. Notice how the white squares are now only in the middle of each edge and no longer on the corners of the brush.
Copying Brushes
Sometimes you want to copy a CSG brush rather than making a new one from scratch. Select the skewed box we created earlier. Now press Control + C followed by Control + V. This standard keyboard shortcut also applies in the Leadwerks editor. The new copied brush is created in the exact same spot as the original one. Use the 2d viewport to drag the copied box around.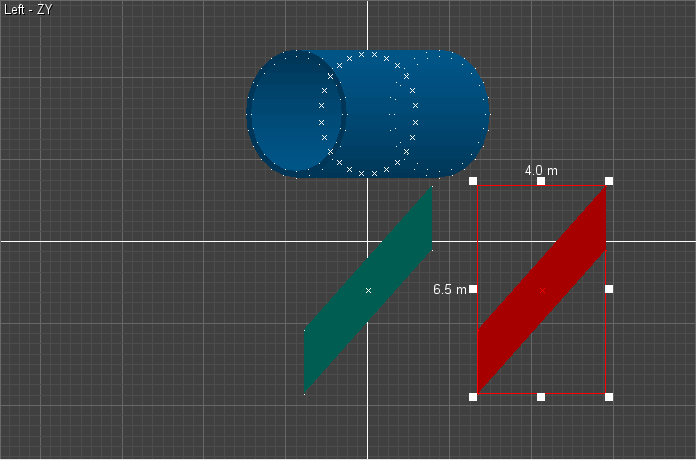 We can also copy brushes by selecting the brush, holding down the control key and then moving the brush. Select the tube brush. Make sure you are in translation mode by clicking on the Translate toolbar button in the main toolbar. Hold down the control key and move the tube to the left of the original tube. Then let go of the mouse.
Carve
The Carve tool is used to perform a boolean subtraction on intersecting brushes.When carve is used, the selected brushes will "carve out" their volume from any brushes they intersect. You can use this to make windows, doorways, and other features quickly and easily.Let's try this out. Create two box brushes and make sure that they intersect halfway. Select one brush and then press the Carve toolbar button.
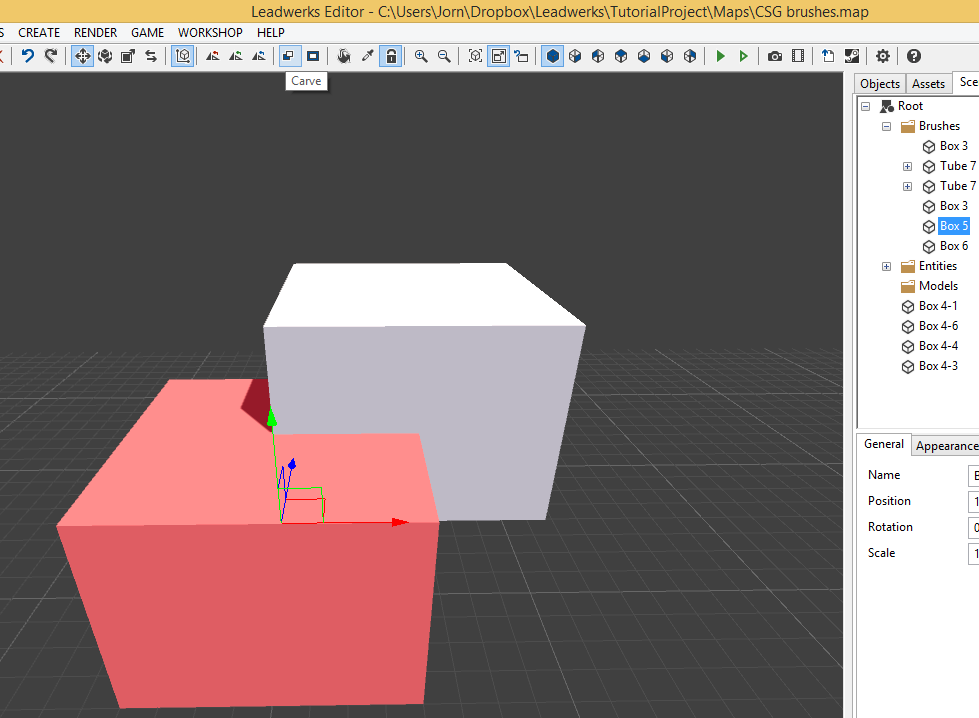 The unselected brush, which intersect the selected brush, is now no longer a box. All the intersection parts are removed. At first sight your will not see a difference, but in the scene tree you can notice that the original brush is now divided into several pieces.
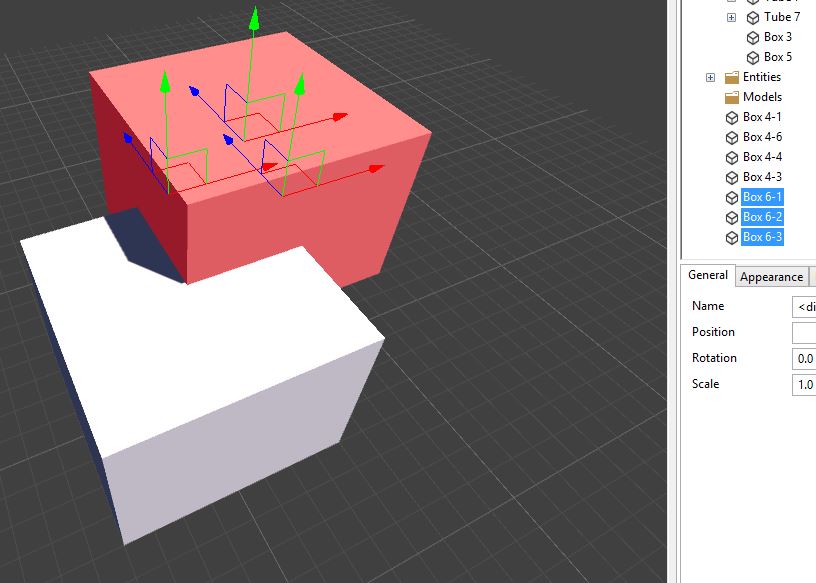 If we select those pieces we can see that they form the remains of the former box. If we move them, the results of the carve operation are apparent.
Hollow
The Hollow tool is used to hollow out a brush. Create a new box brush and press the Hollow toolbar button in the main toolbar.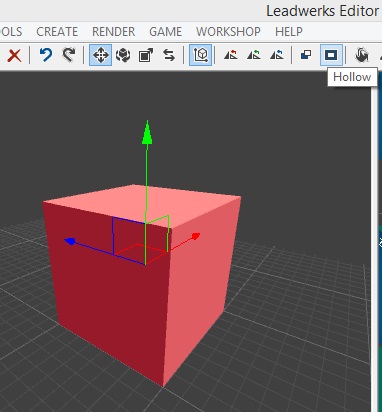 A window will appear displaying a value for the hollow thickness. Here you can specify how thick the walls of your brush are going to be when it is hollowed out. Leave the default value of 32 and press the OK button.
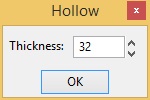 You will not see any differences in the viewport right away. In the scene tree however, you will now see that the brush you created is divided into several objects. All pieces can be moved and modified individually.
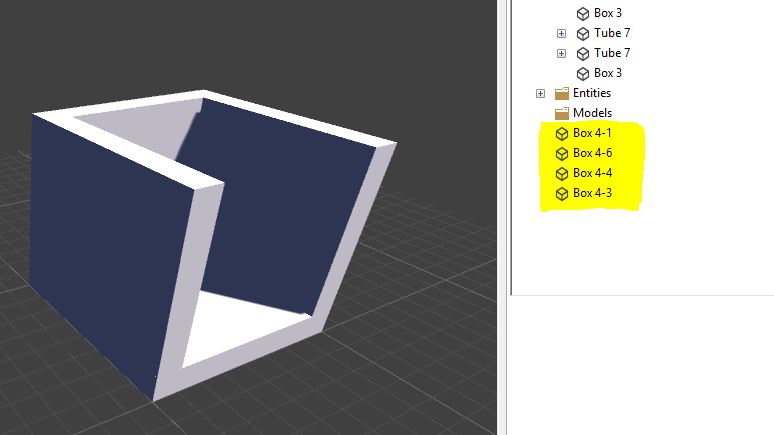 If you move the camera inside the box, you'll see the solid box is now a hollow room.
Face Selection Mode
In the object bar on the left side of the main window, we can also find the Select Face button right below the Select Object button. This button lets you select individual faces on a brush. This can be used to apply different materials to different parts of an object. To select multiple faces, hold down the Control key and click on the individual faces with the left mouse button. Switching back to object selection mode (by pressing the Select Object button) will make the entire object get selected.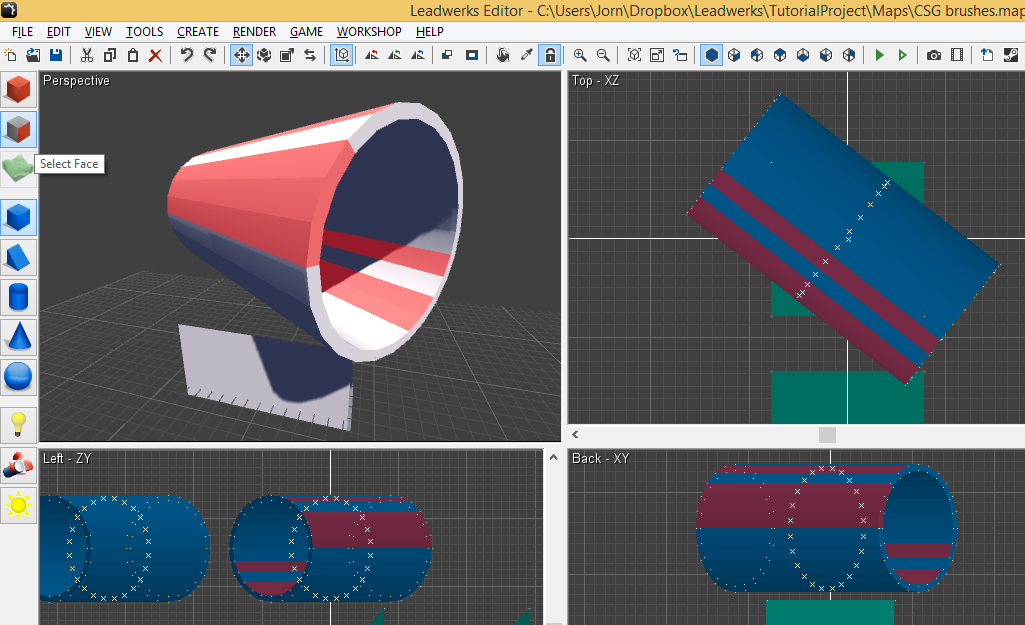 When in face selection mode, the Object Panel will display two sets of extra properties for texture mapping and smooth groups. (The "Justify" buttons are an extra tool used to help control texture mapping):
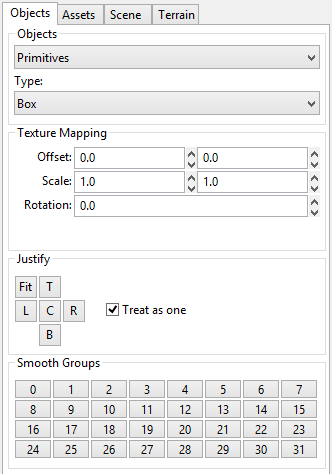 Texture mapping will be covered in another material. For right now, let's just look at the smooth group controls.
Smooth Groups
Smooth groups are a way to make faces on a brush appears as a rounded surface. Cylinders, spheres, and other round shapes will automatically use smooth groups when they are created, but you can modify these to create your own. When you create a new cylinder you may notice that the outside appears rounded, even though we can see the shape is actually made up of lots of flat surfaces: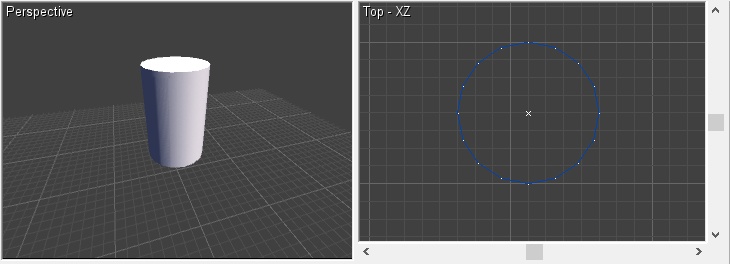 If we remove smoothing groups from this brush, we can see the effect they have. Create a new cylinder, then while in face selection mode, select any face on the side of the cylinder.
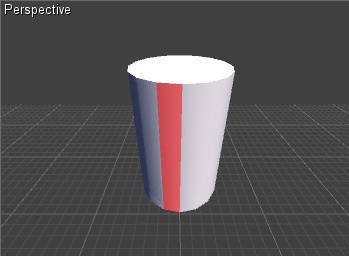 Notice that the smooth group properties now show that this face has smooth group '0' activated:
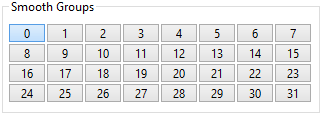 Because the adjacent faces also have the same smooth group activated, the edge where they meet will appear as a smooth rounded surface. If we deactivate this smooth group by pressing the button so it toggles off, the edge will appear sharp and angular. (The face has been deselected in the image below, to show the results more clearly.)
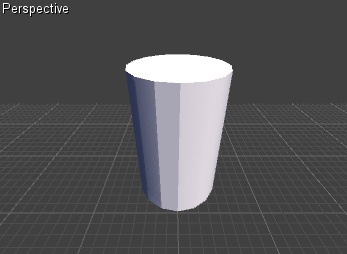 Smooth groups are an advanced feature you probably won't need to worry about much, but they are great to have when you're making levels with lots of rounded features.
Conclusion
Brushes can be used to create all sorts of game levels. Some of your designs might look "boxy" at first, but if this happens a few rounded corners can make your level outlines a lot more interesting. Have fun and be creative with your design.