Terrain
Creating Terrain
To create a terrain, select the Terrain tab in the side panel. Here you can choose a heightmap size. Let's use the default size of 1024x1024 and press the Create button to create a new terrain.
The terrain is now visible as a flat white surface. When you hover your mouse over the terrain, a new mouse tool will appear that lets us modify the terrain. We can switch back to object selection at any time by pressing the Select Object button in the object bar on the left side of the main window. We can switch back to terrain editing mode by pressing the Edit Terrain button below this.

In the terrain editor, your first option is the tool selector. This lets you choose the terrain tool you are going to use to edit the terrain. The first setting is "Sculpt" which can be used to raise and lower the terrain, to create hills.
Sculpt
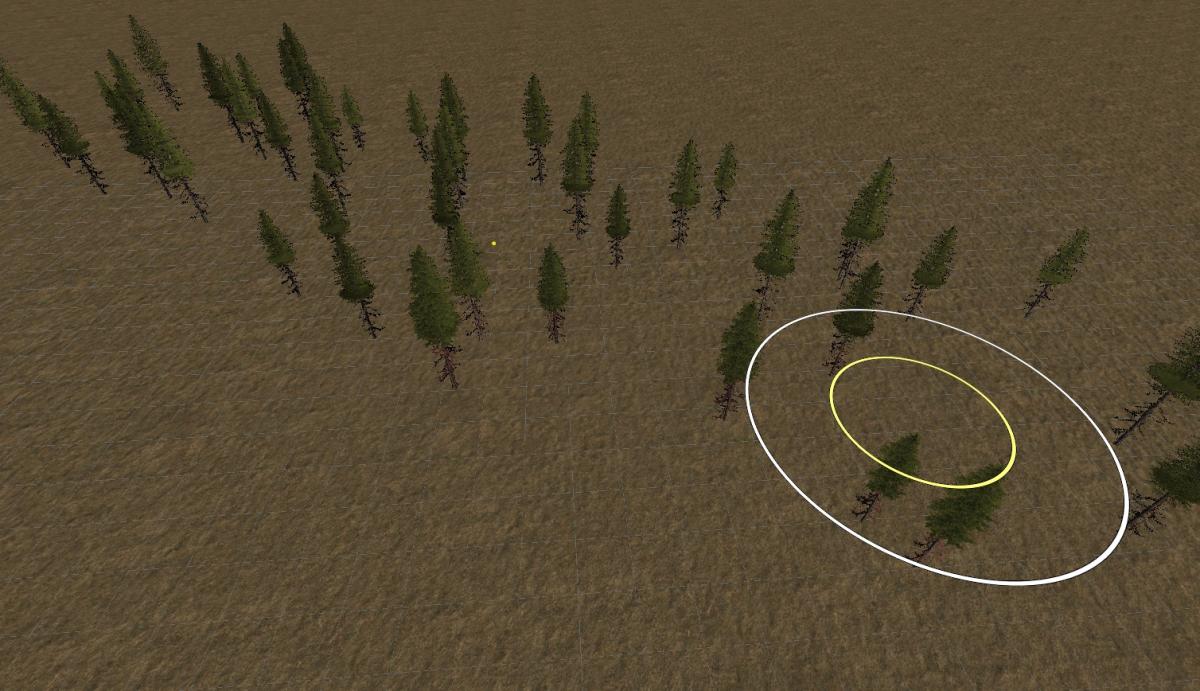
Sculpting terrain is easy and fluid in Leadwerks Editor. If you move the mouse over the terrain you will see a white and yellow circle. These two circles define the inner and outer radius of the terrain tool's magic.
If you hold down the left mouse button and move the mouse, you will start building up the terrain. Try it out by making a small hill. Holding down the control key whilst pressing the mouse will lower the terrain. Try removing the hill that you just created.

The inner and outer radius of the terrain tool can be adjusted to get different effects. The distance between the inner and outer radii will cause hills to appear either smoother or steeper and more cliff-like. Set the outer radius to 20 to cover a larger area. Now set the inner radius to 0.9. Make a large hill on the terrain by holding down the left mouse button on the terrain and moving the mouse around.Now change the inner radius to 0.1 and create another hill next to the first one. Notice how the second hill has a very smooth slope, while the first hill has slopes that are almost vertical.

The strength setting determines how much the terrain is affected by the terrain tool. For adding small details to the terrain you will want a lower strength. If you want to create large mountains instantly, use a higher strength.The height property determines the vertical scaling of the terrain. If we make a hill higher and higher, we'll eventually reach a "ceiling" we can't go above. The terrain height setting lets us alter the maximum height of the terrain so we can create higher mountains. Change the height to 200. This will affect the terrain instantly. Our mountain is now twice as high.

Smooth
We can smooth terrain with the smoothing tool. Select the "Smooth" tool and set the inner radius to 0.5. Now try smoothing out the steep hill you made. The higher the strength the faster the smoothing process goes
Flatten
The flatten tool is used to adjust terrain to one height. It's very useful for making plateaus, which are an area of flat raised ground. Select the 'Flatten" tool and set the outer brush radius to five. Move your mouse so it is hovering over the top of your steep hill. Now hold down the mouse and start dragging the mouse towards lower ground. The terrain underneath the mouse will raise up to the same height you first clicked on, but won't go above this height. If you move too quickly or if the strength setting is low, the terrain will rise, but will not reach the same height.
Importing a Heightmap
You can import heightmaps into leadwerks from 16-bit RAW files. (Image file formats are not supported because the limited resolution causes visual artifacts.) There are many external tools that can be used to generate heightmaps. One such tool is L3DT and it can be downloaded for free. Let's import a heightmap made with this tool. Press the Import button in the terrain editor and select the file "terrain.r16", which is found ine tutorial samples project base directory. Press the Open button and the height data will be loaded into your terrain.
Painting
The painting tool in Leadwerks make it is easy to get a great looking terrain in just a few minutes. Take a look at the "Layers" section below the terrain tool settings. Each layer can have a diffuse, normal, and displacement map. If you right-click on the Diffuse tree node under layer one, a popup menu will appear. Select the Select File popup menu item and choose the "savannah_dirt.tex" file. When you press the Open button, the texture will be added to the first terrain layer. Because this is the bottom layer, it will appear everywhere on the terrain.
We can also add a normal map to the layer to make the terrain appear more detailed. Below you will see a closeup of the terrain before the normal map is added on the left, and an image with the normal map on the right. Which one looks better to you?


Now let's add a second layer. Set the diffuse texture on layer two to the file "savannah_rockwall.tex" and set the normal map to "savannah_rockwalldot3.tex". Your layers should now look like the image below.

All terrain layers above the first one must be painted onto the terrain to make them appear. Select the "Paint" tool and set the terrain tool outer radius to a very large value. Make sure you have layer two selected below, then click and drag the mouse across the terrain. You will see the rock texture appearing everywhere you paint with your brush.

Fill in the entire terrain with the rock texture. If the process is taking too long, just increase the terrain tool outer radius to make it go faster.
Leadwerks performs terrain modification on the graphics card. Parallel processing makes the Leadwerks terrain tool super fast even when editing huge terrains.
Layer Properties
Now let's adjust the layer properties so the rock only appears in certain spots. The layer properties at the bottom of the terrain editor allow us to set constraints that control where a terrain layer can appear. We want to use this rock layer for cliff faces, which means it should only appear on slopes over a certain angle. Set the Min Slope value to 25 degrees
You'll notice that now the rock layer is only appearing on the steep slopes of the terrain.

If we move in closer to the ground, we can see the terrain is starting to look pretty good.

Now let's try some other options by adding another layer for snow. Set layer three's diffuse texture to "mountain_snow.tex" and its normal map to "mountain_snowdor3.tex".

Using a large outer brush radius, paint the entire terrain with the snow layer.

Because of the gradient in temperature over different altitudes, snow typically only stays frozen above a certain altitude. This is called the "snow line" and you've probably encountered it if you've ever driven to the mountains during winter or spring. We can simulate this phenomenon by just setting a minimum height the snow layer can't appear below. Set the Min Height value to 60 meters and you'll instantly see the results.

This looks better, but we're not done yet. Snow usually slides down slopes and accumulates on flat surfaces. If we set a maximum angle the snow can't appear above, we'll get a more realistic distribution of snow. Just set the Max Slope value to 25 degrees and enjoy your snowy results.

Now that is looking good!
Displacement Maps
We can use displacement maps to add more detail to the terrain and make it look really good. Set the diplacement map of layer three (the snow layer) to the file "mountain_snowdispl.tex". Your final layers will look like the image below.
When a displacement map is specified, the terrain renderer will use it to adjust the way texture layers transition. Compare the images below showing the original terrain above, and the snow layer with a displacement map below that. Which one looks more detailed?


The Transition property controls how quickly terrain layers fade in and out. If we increase the snow layer's transition value to 20 something amazing happens.

The wider transition area allows the terrain layer details to really come out, creating new features that aren't in any of the original textures. Pretty amazing, huh? These settings will make pretty much any heightmap look great.
Vegetation
Leadwerks Game Engine 4 adds a vegetation tool that lets you paint trees, plants, and rocks onto your landscape. This makes it easy to quickly generate a dense forest or grassy prairie. The Leadwerks vegetation system is special because it uses a distribution algorithm to procedurally generate objects, instead of storing them in memory. This makes the system fast, efficient, and easy to work with.To get started using the vegetation tool, select it in the Tool dropdown box in the terrain editor.
Before we can begin painting vegetation, we need to add a new vegetation layer. At the bottom of the vegetation layer list, press the Add button to add a new layer.

A dialog box will open. Select the file "Models\Trees\Pineo1.mdl" and press the Open button.

Now you can paint trees onto the terrain. Position the mouse over the terrain in the perspective viewport. Click and hold the left mouse button, then drag the mouse across the area where you want trees to appear. As you move the mouse, trees will be painted on to the landscape. Notice that trees that are far away from the camera will smoothly fade from view.
Vegetation Layer Settings
The terrain editor displays settings for the selected vegetation layer.
For example, we can enable shadows on our vegetation layer to give our trees a much better appearance.

If we decrease the density setting to 4.0, our little forest will become much more tightly packed with a lot more trees:

The settings you use will vary based on what type of object you are painting. For large trees, the following settings are recommended:
- Shadows: Enabled
- Billboards: Enabled
- Density: 8-16
- View range: 300
- Billboard distance: 30
- Max slope: 25
- Shadows: Enabled
- Billboards: Enabled
- Density: 8-16
- View range: 150
- Billboard distance: 30
- Max slope: 25
- Shadows: Disabled
- Billboards: Disabled
- Density: 4-8
- View range: 100
- Billboard distance: 30
- Max slope: 60

Vegetation Materials
Models that are meant to be used as vegetation layers should have vegetation shaders specified in their material files. This will allow the engine to apply effects like making grass cling to the landscape, or making leaves wave in the wind. The vegetation shaders can be set in the material editor shader settings. If no vegetation shaders are specified, the default shaders will be used.