Introduction to Lua
Project Setup
This series of tutorials uses the "Tutorial Samples" project template, which comes with Leadwerks. When you first start Leadwerks, the New Project window will open. If you have already created a project, then select the File > Project Manager menu item in the main menu to open the Project Manager. Press the New button to open the New Project window.
Select the "Tutorial Samples" template, enter a name for your project like "Tutorials", and press the OK button to create your new project. Make sure the new tutorials project is selected in the projects list, then press the OK button to load this project and begin the lessons.

Lua and Leadwerks
Lua is a popular scripting language that has been used in thousands of games. Some you might have heard of, like Call of Duty, Crysis, and World of Warcraft. Lua's ease of use, performance, and flexibility have made it a game industry standard. So when you use it, you're in good company!.Lua scripts are text files that use the LUA file extension. Every Leadwerks project has one script in the "Scripts" folder called "Main.lua". This is the main script the game looks when it starts running.
You may encounter examples or projects that refer to a file called "App.lua". This is an older file the engine used to use that has been kept for backwards compatibility.
The Script Editor
Select the Assets tab in the side panel, then click on the "Scripts" folder in the asset browser. Double-click on the thumbnail for the "Main.lua" file to open it in the Script Editor. You'll see a main text area with a lot of colored text that probably looks like gibberish. That's perfectly okay because we're going to teach you Lua one step at a time.
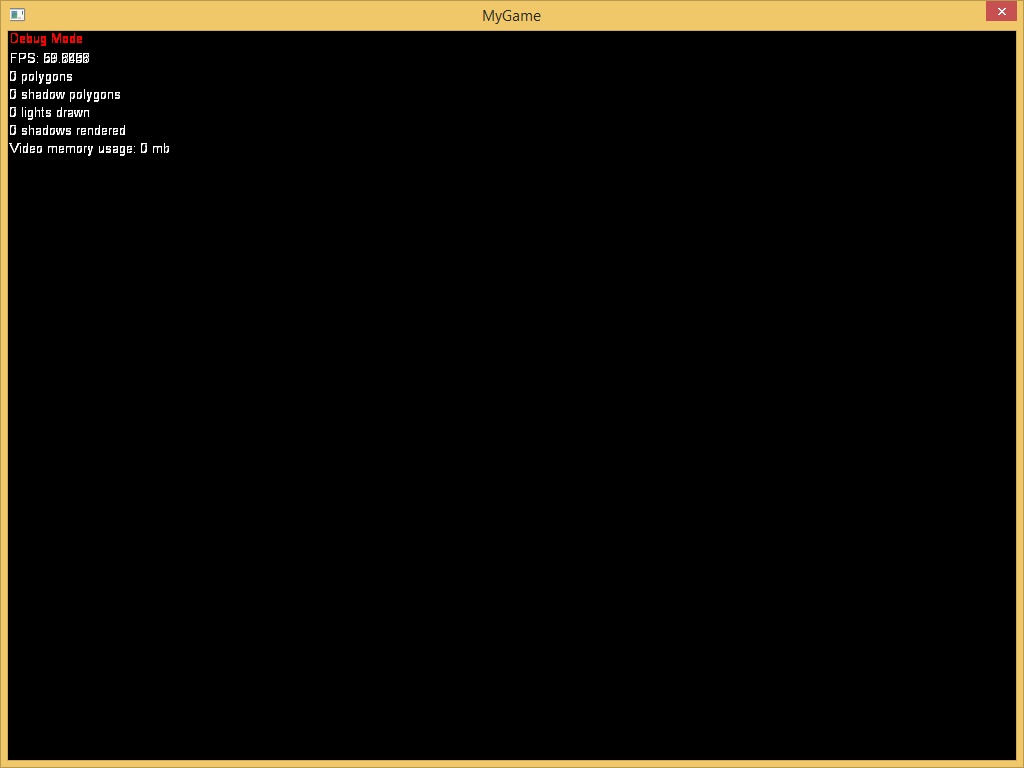
It isn't important for you to understand now what all that code does. All you need to understand is that the code tells the game what to do. We can run the game by selecting the Game > Debug menu item in the script editor menu. Do this now. You'll see a window open up with a black screen and some text. The black screen means that it's working, since we haven't started to tell the game what to do. Once you are satisfied with the performance of your black screen, you may press the Escape key to end the game.
Hello, World!
Let's try writing our very own computer program with Lua. First, make a backup of your Main.lua file by selecting the File > Save As menu item in the script editor menu. When the file save dialog appears, enter the file name "Main_BACKUP.lua" and press the Save button.
Close the script editor window, and then double-click on the file "Main.lua" to open it again in the script editor. Make sure you have the original "Main.lua" file open, not the backup copy we made. Select the Edit > Select All menu item to select the entire contents of the code editor. Press the Backspace key to delete all the text so we start with a completely blank file. (Now you see why we made a copy of the script.)
In the code editor, enter the following text:
print("Hello, World!")Select the Game > Debug menu item in the main menu and look at the printed text in the output panel below. The print() command has caused a line of text to appear in the program output.

Did you know the "Hello, World!" program dates back to 1974? You just wrote your first program, which makes you a programmer. That wasn't so hard, was it?
API Reference
All the available commands in Leadwerks are documented in the API Reference. Most commands include an example you can run to show how the command works. The API Reference can be opened by selecting the Help > Help Contents menu item in the script editor window.Let's try running one of the examples from the API Reference. Open this link in your browser in a new tab. This is the documentation for the GoToPoint function, which is part of the Entity class. (You don't need to understand just yet what those terms mean.) Towards the bottom of the page there will be a section called "Examples". There are two tabs underneath it, one with a Lua example, and another with an example using the programming language C++. We only care about the Lua code for this lesson. For your convenience, this code has been copied below:
--Create a window
window = Window:Create()--Create a rendering context
context = Context:Create(window)--Create a world
world = World:Create()--Create a camera
local camera = Camera:Create()
camera:SetRotation(35,0,0)
camera:Move(0,0,-8)--Create a light
local light = DirectionalLight:Create()
light:SetRotation(35,35,0)--Enable navmesh debugging
camera:SetDebugNavigationMode(true)--Create the ground
local ground = Model:Box(10,1,10)
ground:SetPosition(0,-0.5,0)
ground:SetColor(0.0,0.25,0.0)--Create a shape
local shape = Shape:Box(0,0,0, 0,0,0, 10,1,10)
ground:SetShape(shape)
shape:Release()--Create a model
--This is an obstacle the player will walk around
entity = Model:Box(1,1,3)
entity:SetColor(0.0,0.0,1.0)
entity:SetPosition(0,0.5,0)--Create a shape
local shape = Shape:Box(0,0,0,0,0,0,1,1,3)
entity:SetShape(shape)
shape:Release()--Enable navigation obstacles
ground:SetNavigationMode(true)
entity:SetNavigationMode(true)--Build the navigation mesh
world:BuildNavMesh()--Create a character
player = Pivot:Create()
local visiblecapsule = Model:Cylinder(16,player)
visiblecapsule:SetScale(1,2,1)
visiblecapsule:SetPosition(0,1,0)
player:SetPosition(-4,0,0)
player:SetMass(1)
player:SetPhysicsMode(Entity.CharacterPhysics)while window:KeyHit(Key.Escape)==false do
	if window:Closed() then break end	if (player) then player:GoToPoint(4,0,0,1.4,1) end	Time:Update()
	world:Update()
	world:Render()	context:SetBlendMode(Blend.Alpha)
	context:DrawText("NavMode: "..tostring(entity:GetNavigationMode()),2,2)	context:Sync()
end
Select the entire Lua code example in your browser and copy the text by pressing Control + C. Click the mouse inside the cope editor and paste the text into the "Main.lua" file by pressing Control + V.

Select the Game > Debug menu item in the script editor menu to run this example. This particular example demonstrates some simple AI navigation, with a character controller that walks around an obstacle.

Because we changed the code in the "Main.lua" file, the game executed different instructions and acted differently. This is how code controls a game. The API Reference contains hundreds of examples for all the commands in Leadwerks. And now you know how to try them all out.Before we finish up, let's restore our old "Main.lua" file. Close the script editor window. Right-click on the "Main.lua" file thumbnail in the asset browser and select the Delete popup menu. Press OK when the message box asks whether you're sure you want to delete the file.

Name the new script "MyScript" and press the OK button.

Double-click on the file thumbnail in the asset browser to open your new script in the script editor. You'll see a lot of green text. When a new script is created, it comes with the available functions already written but commented out. A function is a bit of code that performs some action. Functions are a useful way to organize code, because they can be used anywhere, so you don't have to write the same code over and over again. We'll learn more about functions in another tutorial.

The "--[[" and "]]" characters around each block of text cause the text to be commented out. Code that is commented out will change color indicating that it is inactive, and will be skipped when the game is run. Since every block of text in this script is commented out, it won't do anything until we change it.Find the function called Script:UpdateWorld() and remove the "--[[" and "]]" characters before and after it. As soon as you do, you'll see the text changes colors. It is no longer commented out, and will be run by the game.

Now add this text on the blank line inside the UpdateWorld() function:
self.entity:Turn(0,0,1)
The function should now look like this. Indenting the code inside the function makes it easier to see the organization of the code.
function Script:UpdateWorld()Adding this command will cause the object to turn one degree on its Z axis each time the UpdateWorld() function is called. The UpdateWorld() function will be called continuously, once each frame. Select the File > Save menu item in the script editor menu to save the changes to your script, then close the script editor window.
self.entity:Turn(0,0,1)
end
Attaching Scripts
Now we're going to learn how to attach a script to an object in the editor. Select the File > Open menu item in the main menu and choose the file "Object Scripts.map". Press the Open button to open this map. The map consists of just three objects. A model of a fan blade assembly is in the center of the scene, a camera is pointed at the fan so that the map will be visible, and a directional light is above, to add light to the scene.Select the Game > Debug menu item in the main menu to run the game. You will see the fan, lit by the directional light, rendered from the point of view of the camera that is placed in the map.

The fan just sits there looking very boring, so let's spice things up with an object script. Press the Escape key to end the game and go back to the editor. Select the fan model by clicking on it in any viewport. The object will be highlighted in red, indicating that it is selected.

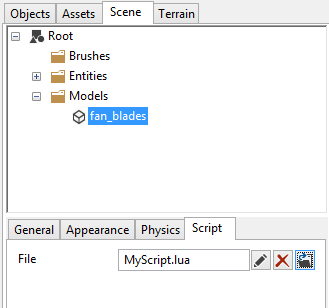
Now select the Scene tab in the side panel. In the properties panel below, select the Script tab.

Press the Select File button next to the Script property. (This is the button with a folder icon displayed on it.)

Press the Open button and your script will now be attached to the object.
Now that we've added the script, select the Game > Debug menu item in the main menu to run the game again and see what happens.

The UpdateWorld() function will be called each frame, causing the fan to spin. Pretty cool, huh?
Object Script Functions
There are a bunch of other pre-defined functions that will be called at various points in the game, if they are present in an object script. Let's go over them now.Script:Start
This function will be called once when a map is loaded, before the game starts running. If you need to load or initialize anything, this is the place to do it.Script:UpdateWorld
This function is called once per frame, we already have seen. Use this for anything that needs to be regularly updated.Script:UpdatePhysics
This function is called at a constant rate of 60 times per second, and is independent from framerate. Although it is called by the engine in the World::Update function, this may be called several times per frame, or it may be skipped some frames, depending on how fast your game is running.Script:Collision
This function will be called whenever an object bumps into something else. You can use this to make a missile explode on impact, or make a sound play when an object falls.Script:Draw
This is called the first time an object is rendered during a scene render. This is a good place to put animation commands, because they will only get called once, and will be skipped if the object isn't visible.Script:DrawEach
This function will be called every single time an object is drawn during a scene render. (An object may be drawn multiple times for shadow rendering or if there are multiple cameras present in the world.)Script:PostRender
This function will be called after rendering. Use this for any 2D drawing you want to add, like a GUI or a message on the screemn.Script:EndAnimation
This function is called when the end of an animation sequence was reached, when called by the Entity::PlayAnimation function with the mode set to one-shot animation. You can use this to trigger some event that occurs at the end of an animation.Script:Detach
This function will be called when the script is removed from the object, or if the object is deleted.Script:Cleanup
This function is called when every single instance of the script is detached, and the script is no longer in use. You can use this to delete any shared resources the script uses.
Conclusion
That was a good overview of how Lua script works in Leadwerks. We saw how the main script controls the game, how to try examples from the API Reference to see how commands work, and how to create our own object scripts and attach them. In further tutorials we will delve into the specifics fo the Lua programming language and learn how to write more advanced code to make games.